
The Counter-Intuitive Twist: Locking Bobby Pins Against Gravity
A technical breakdown of the friction method and 180-degree rotation that keeps updos intact for over 12 hours.


I have watched brides cry in venue bathrooms thirty minutes before walking down the aisle. I have seen editorial models leave a set with a perfectly tousled low bun only to return from lunch with a sad, drooping ponytail. The issue is rarely the weight of the hair or the quality of the styling products. It is almost always a failure of mechanics. Most people treat a bobby pin like a decorative staple rather than a precision spring-loaded tool.
A bobby pin is designed to grip through tension and friction, yet the vast majority of users insert them in a way that neutralizes both capabilities. You slide the pin straight in, maybe crisscross two of them for good measure, and hope for the best. That works for static hair, but the moment you tilt your head forward, gravity finds the path of least resistance and slides the pin right out.
To secure an updo that survives a humid summer evening or an active dance floor in 2026, you need to understand the "lock." This is not a mystical styling secret; it is pure physics involving rotation and the exploitation of the pin’s serrated edge. Once you master the specific mechanical twist, the reliance on hairspray diminishes significantly.
The Ribbed Side vs. The Smooth Side (And Why 90% of Us Get It Wrong)
The first mistake happens before the pin even touches the head. Look at a standard #2 bobby pin. One side is straight and smooth; the other is wavy or ribbed. That ribbing is not decorative. It is the primary source of friction. The smooth side allows the pin to glide, while the ribbed side creates drag against the hair cuticle.
If you place the pin with the ribbed side facing up (away from the scalp), you have effectively created a slippery ramp for your hair to slide down. The pin clamps onto the strand, but the strand sits on the smooth surface facing the scalp, offering zero resistance to movement.
Always insert the pin with the ribbed side facing down, against the scalp. This ensures that the ridges bite into the hair closest to the root, which is the anchor point of your structure. However, orientation alone is not enough. I see plenty of clients who get the orientation right but still fail because they ignore the texture of the hair they are pinning. Fine, slippery hair requires a different approach than coarse, textured strands. Just as we debunked the myth that brushing 100 strokes makes hair shinier, we must also abandon the idea that one pinning technique works for every hair type. For fine hair, you need to maximize surface area contact, often by backcombing the specific section where the pin will sit to create a cushion for the ribbing to grab.
Preparing the Foundation for Traction
You cannot lock a pin into moving air. The receiving section of the hair must be stable. When building an updo, we often focus on the aesthetic shape—the swoop of the roll or the height of the chignon—while neglecting the foundation.
Think of the hair you are pinning into as "grain." If you pin across the grain, the pin will eventually ride up and out. You must pin with the grain, or at a perpendicular angle that intersects multiple grain directions for a firm hold.
- Section the target area: Isolate the section of hair that needs to be secured. Do not try to pin a massive, vague lump of hair.
- Create a pivot point: Use your index and middle fingers to press firmly against the scalp where you want the pin to enter. This pressure creates a temporary gap in the hair density, allowing the pin to travel deep to the scalp rather than getting stuck halfway up the strand.
- Tension check: Pull the section of hair you are securing in the opposite direction of where you want it to rest. If you are securing a low bun, pull the hair upward slightly before pinning. This pre-loads the tension so that when you release the pin, the hair wants to snap back into place, tightening the grip around the metal.
The Gravity-Defying Lock Sequence
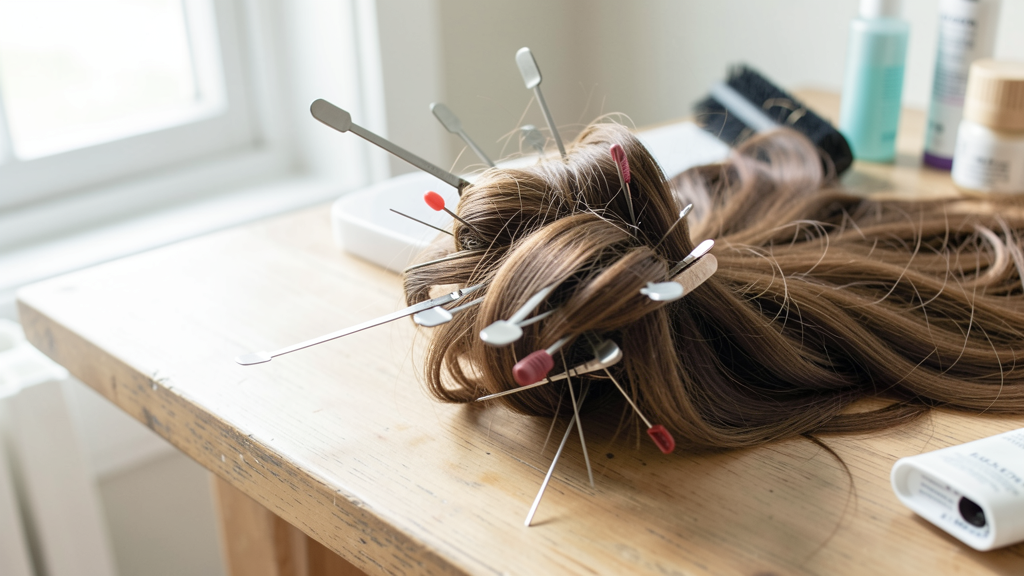
This is the core of the technique. The "slide and pray" method involves pushing the pin in until it stops. The locking method involves a specific insertion angle and a mid-air rotation. This sequence works because it turns the bobby pin from a simple clamp into a hook.
Step 1: The 45-Degree Entry Do not insert the pin perpendicular to the scalp. Enter the hair at a sharp 45-degree angle, roughly one inch away from the section you intend to secure. The open side of the pin should be facing the direction of the hair's tension. Imagine you are pinning a section at the nape of the neck; enter the pin pointing downward towards the center of the bun.
Step 2: The Deep Scoop Push the pin all the way through the section of hair you are securing and into the foundation. The goal is for the tip of the pin to exit the other side of the hair bundle or hit the scalp. You want the "U" bend of the pin to be slightly exposed, but the majority of the metal should be buried.
Step 3: The 180-Degree Twist This is the step that changes everything. Once the pin is fully inserted, do not let go. Rotate the pin 180 degrees along its long axis. If the wavy side was facing down when you started, it is still facing down, but the opening of the pin has now changed direction relative to the hair shaft.
By twisting the pin inside the hair mass, you force the individual strands to rearrange around the metal. This creates a "Chinese finger trap" effect—the more the hair tries to pull away, the tighter the pin locks down. The twist catches the cross-hairs of the strands, mechanically interlocking the metal with the keratin.
Step 4: The Tuck After the rotation, tuck the tip of the pin slightly back under the surface of the hairstyle or into the scalp. You are essentially creating a small hook at the end of the pin that catches the hair mesh. Release the pressure slowly. The pin should now feel immovable.
Structural Bracing for Heavy Chignons
A single locked pin is strong, but a heavy updo requires a truss system. Once you have mastered the twist on individual pins, you must consider the geometry of your support structure.
For heavier styles, such as a thick braided crown or a vintage French twist, you need to employ "cross-locking." This involves using two pins for every critical anchor point. Insert the first pin using the locking twist described above. Insert the second pin directly over the first, but in the opposite direction.
For example, if Pin A entered from the left and twisted right, Pin B should enter from the right and twist left. This creates an "X" formation that is incredibly resistant to shearing forces. If gravity pulls down, Pin A resists. If the head movement pulls sideways, Pin B resists. This redundancy is what allows runway styles to survive a quick change or a windy photoshoot.
However, be cautious of over-pinning. I see clients who create a fortress of steel that becomes uncomfortable to wear. Excessive tightness at the scalp can lead to traction alopecia or immediate tension headaches. If you feel a throbbing sensation at the temples or nape while styling, you are pulling the base too tight, not necessarily pinning incorrectly. This distinction is crucial; there is a difference between a secure hold and a painful one, as we discussed when exploring why your ponytail might give you a headache.
The "Kickstand" Technique for Slippery Layers
Layers are the enemy of the updo. Short, wispy pieces at the nape or crown tend to work their way free of the main mass, creating a " halo" of frizz by midday.
To lock these stubborn pieces without using excessive gel, use the kickstand method. Secure the main updo as usual. Take a stray wisp of hair and twist it tightly. Place a bobby pin vertically, standing straight up like a kickstand, catching the twisted wisp and anchoring it into the main bun. Push the pin down until only the top curve is visible.
Now, push the top of the pin forward (towards the face) until it is parallel to the scalp, essentially laying the kickstand flat. This action drags the wisp of hair underneath the main mass of the bun, tucking it away securely. The mechanical leverage used to push the pin down locks it against the resistance of the hair above it.
When to Abandon the Pin Entirely
Despite these techniques, bobby pins have a limit. They are designed for hair that is at least three to four inches long to allow for the "scoop" and "tuck." If you are working with very short pixie cuts or extremely fine, silky hair that lacks density, even the lock twist will fail within an hour.
In these scenarios, you must switch tools. Hair pins (the two-pronged U-shaped wires) are actually superior for bobby-pin-resistant hair because they rely on weaving rather than clamping. Similarly, grip clips or small silicone elastics might be necessary to create the initial anchor before you even think about inserting a pin for decoration.
Additionally, check your equipment. If your pins are old, bent, or the rubber tips have fallen off, they will snag and pull rather than slide and lock. A pin with a bent spine loses its spring tension, rendering the locking twist useless. I advise my clients to replace their pin supply every six months. Bent pins are for the trash, not your hair.
The final test of a successful lock is the "shake test." Once your updo is complete, bend at the waist and shake your head vigorously side-to-side. If you hear rattling or feel movement, return to the anchor points. Apply the twist. Reorient the ribbing. A properly locked updo should feel like a natural part of your head, silent and solid, capable of handling whatever the day throws at it.
Read next
Why Does My Ponytail Give Me a Headache?
Understanding the specific nerve response triggered by tension at the temples can save you from migraines while keeping your style intact.
The 100-Stroke Myth: Why Excessive Brushing Is Destroying Your Cuticle Integrity
Why the old advice of nightly 100-stroke sessions is mechanically damaging your hair’s cuticle layer and causing breakage instead of shine.